

I always love using seasonal and holiday stitching as an excuse to try something new, so I pulled together a few decorative stitches I’ve been loving lately to make a Fall Stitch List. Some might already be favorites, but hopefully there are a few new ones you’ll want to work into your next project!
XO, Morgan
How to Stitch Reverse Heart Bargello
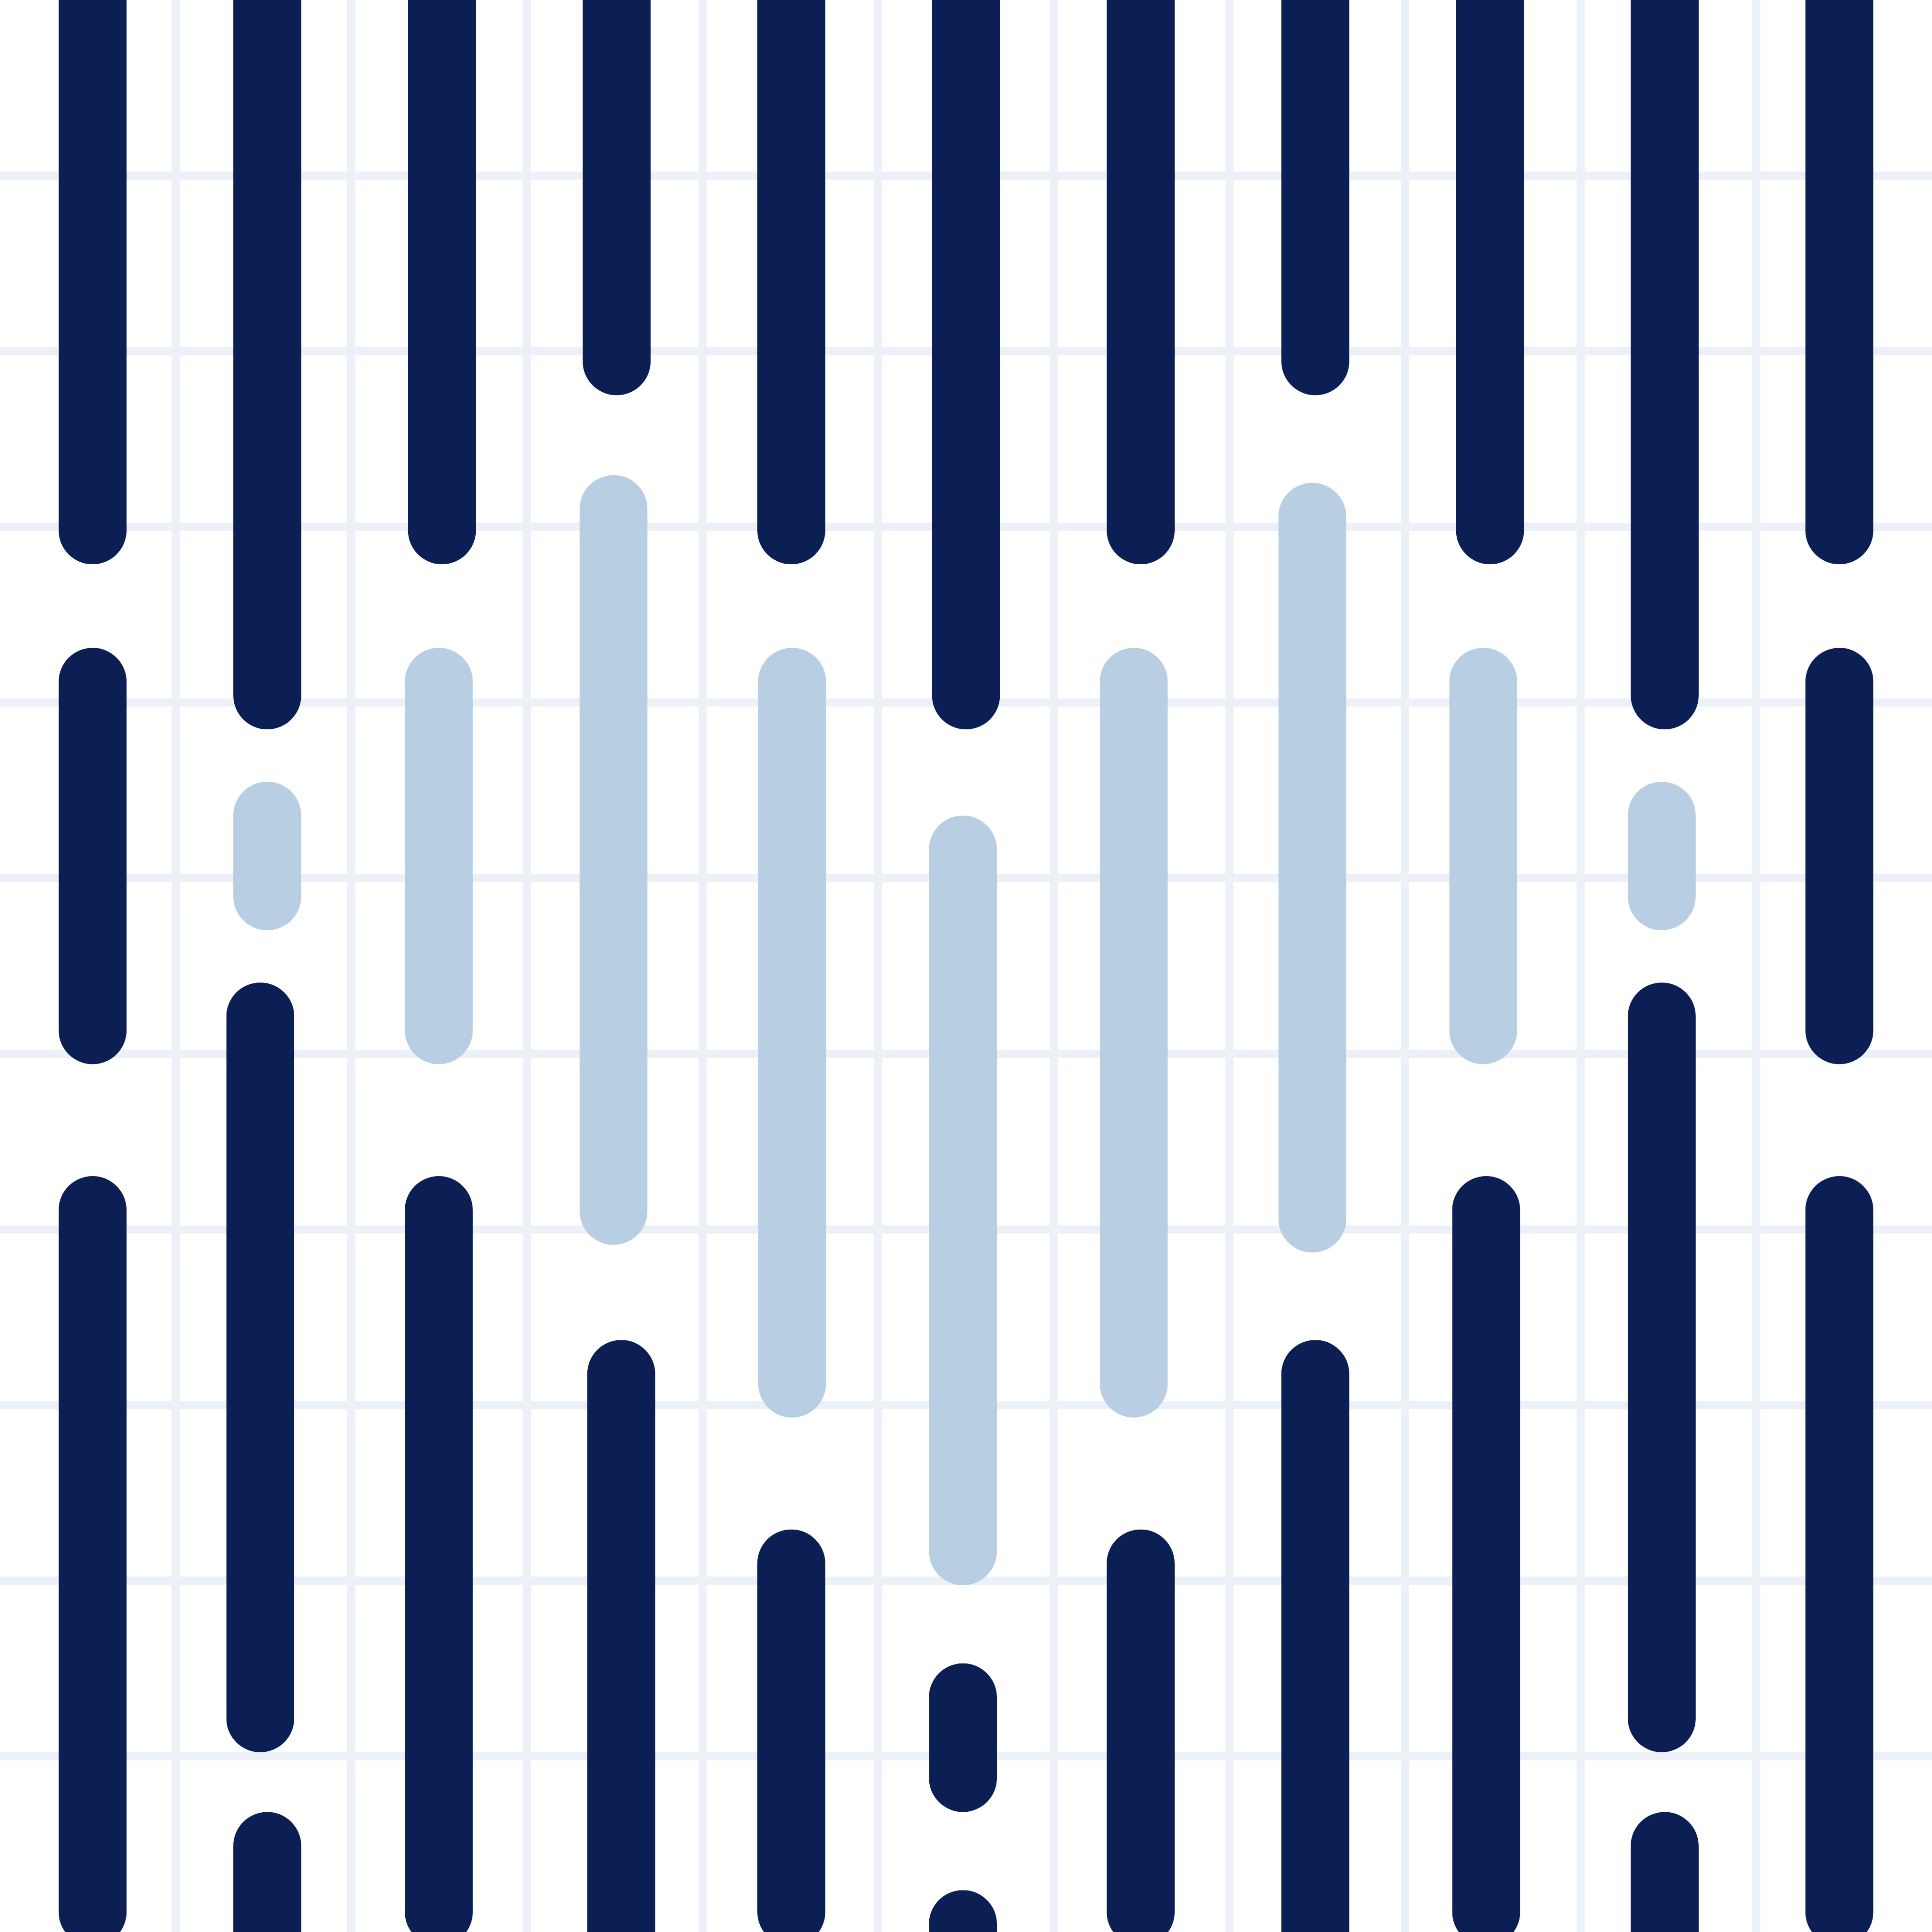
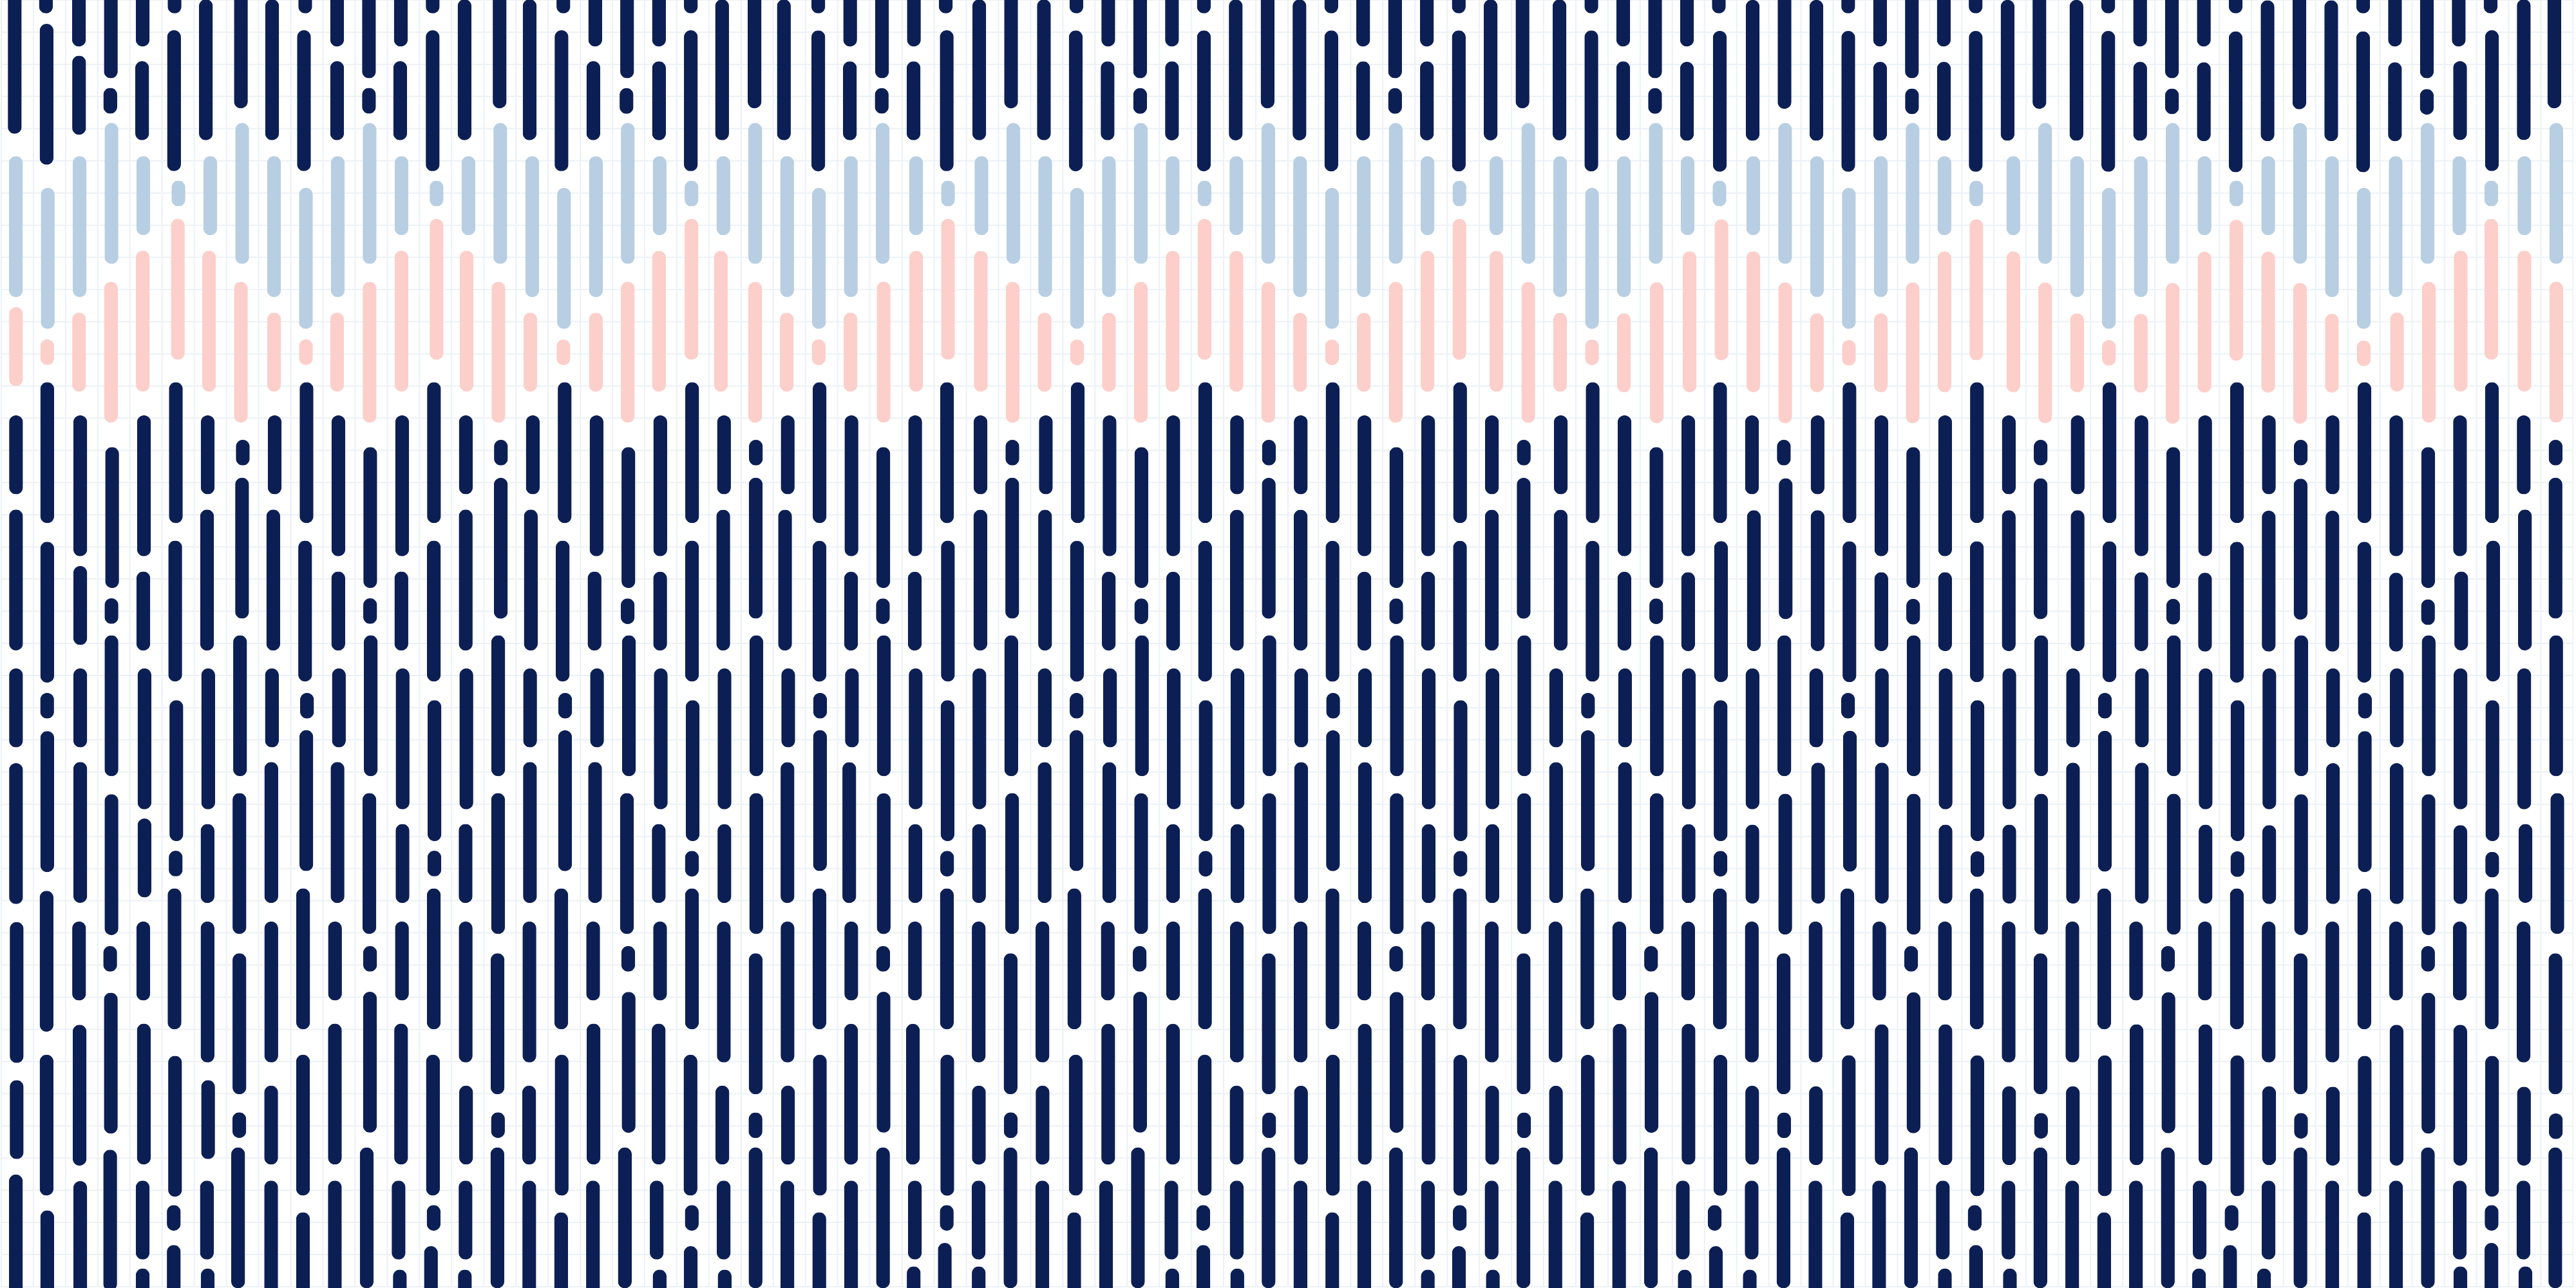
Reverse Heart Bargello is a playful twist on classic Bargello, creating a repeating heart-like pattern that adds movement and texture to your canvas. If you’re already comfortable with Bargello, this is such a fun stitch to add to your lineup.
Choose Your Canvas & Threads
Reverse Heart Bargello works beautifully on both 13- and 18-mesh canvas. A smooth thread like silk or cotton will help keep the heart shapes crisp and defined.
Establish Your Pattern
Begin by following the repeating Bargello pattern, using a combination of shorter and longer stitches to create each heart motif. Once you establish the first section, you can use it as your guide for the rest of the area.
Work in Vertical Steps
Like traditional Bargello, each stitch is worked vertically. Pay attention to the peaks and dips of the pattern as you stitch so each heart stays aligned with the ones around it.
Keep Your Tension Even
Because Bargello stitches span multiple canvas threads, avoid pulling too tightly. Consistent tension will keep your pattern smooth and prevent the canvas from distorting.
Play with Color
This stitch is especially fun for experimenting with color. Try a gradient for an ombré effect, variegated threads for extra movement, or tone-on-tone shades for something a little more subtle.
Reverse Heart Bargello is perfect for backgrounds, borders, and statement areas where you want to add a little personality without overwhelming the rest of your canvas.
How to Stitch Brick Stitch
Brick Stitch is one of those stitches that’s simple but makes such an impact. Its staggered pattern creates a clean, structured texture that works beautifully for backgrounds, buildings, and other straight-edged details. You can work it vertically or horizontally depending on the look you want.
Vertical Brick Stitch Over 2

1. Start Your First Stitch
Secure your thread and bring your needle to the front of the canvas at your starting point.
2. Stitch Vertically
Create a vertical stitch over two canvas threads.
3. Stagger Your Next Stitch
Move to the next position, offsetting your stitch so it sits between the stitches in the previous row.
4. Continue the Pattern
Repeat the staggered pattern across the area, keeping your stitch length and tension consistent.

Horizontal Brick Stitch Over 2
1. Start Your First Stitch
Secure your thread and bring your needle to the front of the canvas.
2. Stitch Horizontally
Create a horizontal stitch over two canvas threads.
3. Offset the Next Row
Move to the opening just below and between the stitches in the previous row and create another horizontal stitch over two canvas threads.
4. Repeat
Continue filling the area, keeping each row staggered to create the classic brick-like pattern.
Try Brick Stitch with a variegated thread when you want to add even more dimension and color variation.
How to Stitch Scotch Stitch
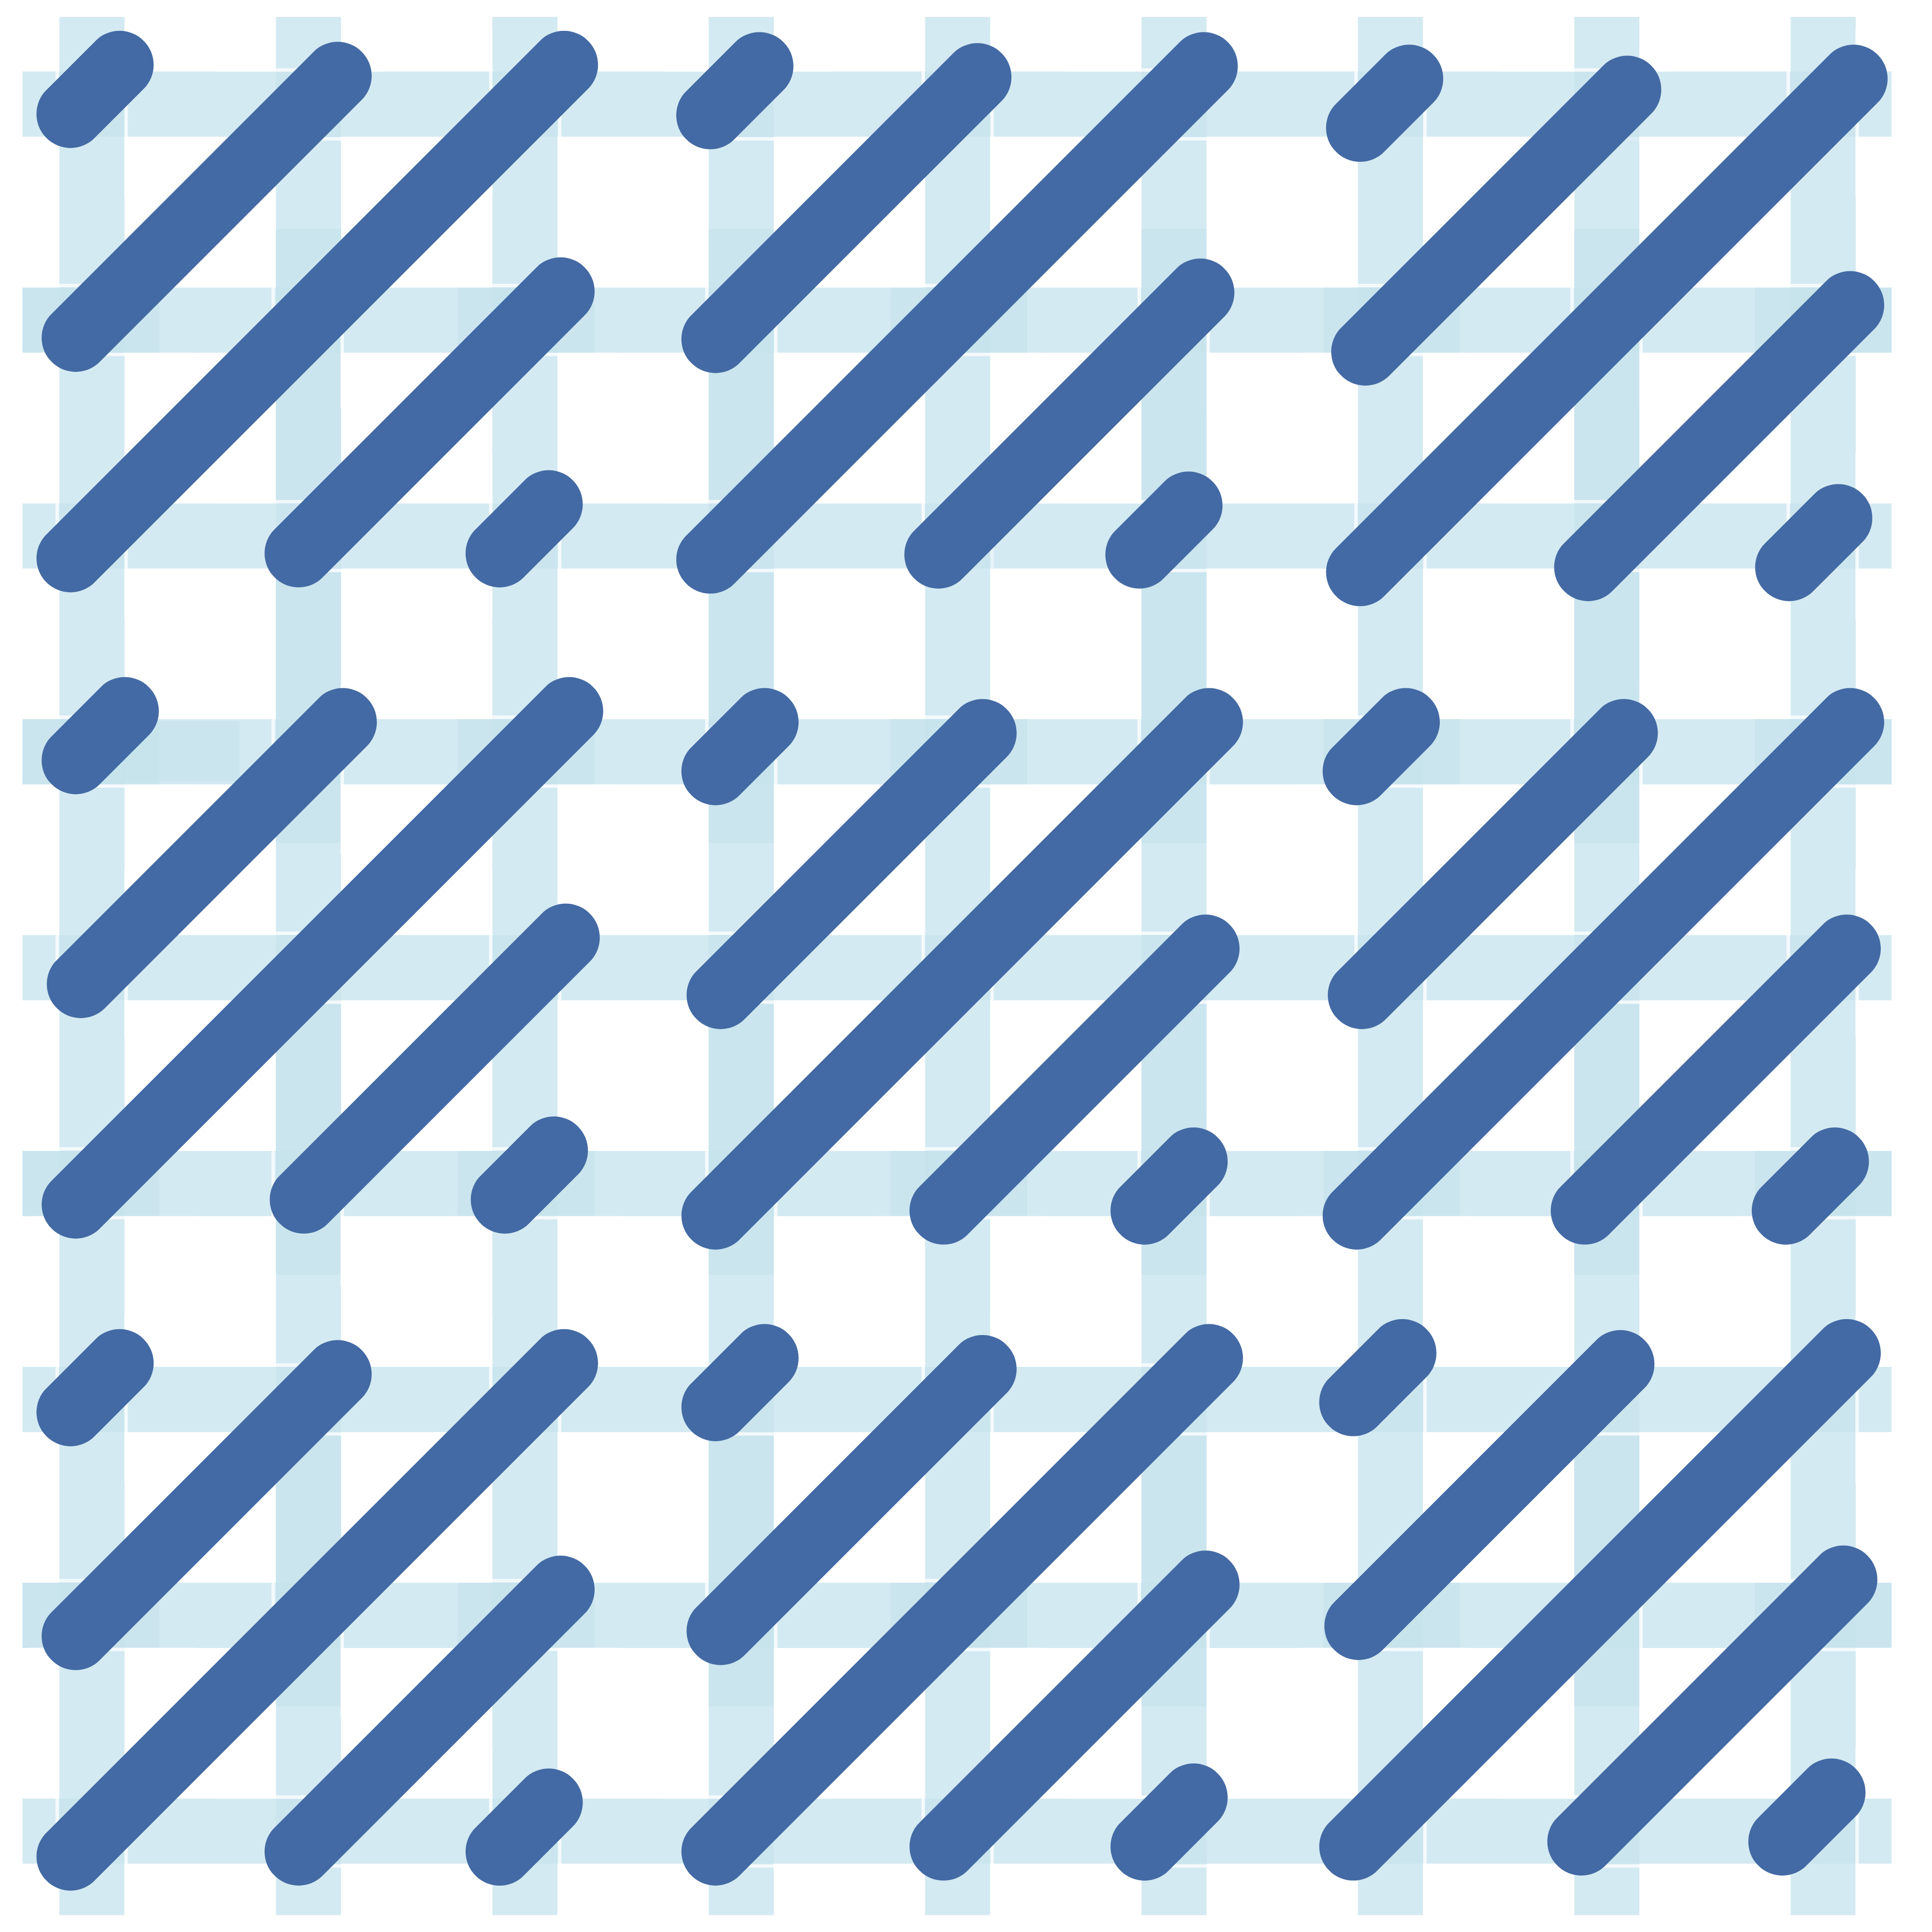
Scotch Stitch is a needlepoint staple for a reason. Also known as Cushion Stitch, its repeating square pattern creates subtle dimension while still feeling clean and structured. It’s a great choice for backgrounds, accents, or larger areas where you want a little more interest than a basic Tent Stitch.
1. Start with a Tent Stitch
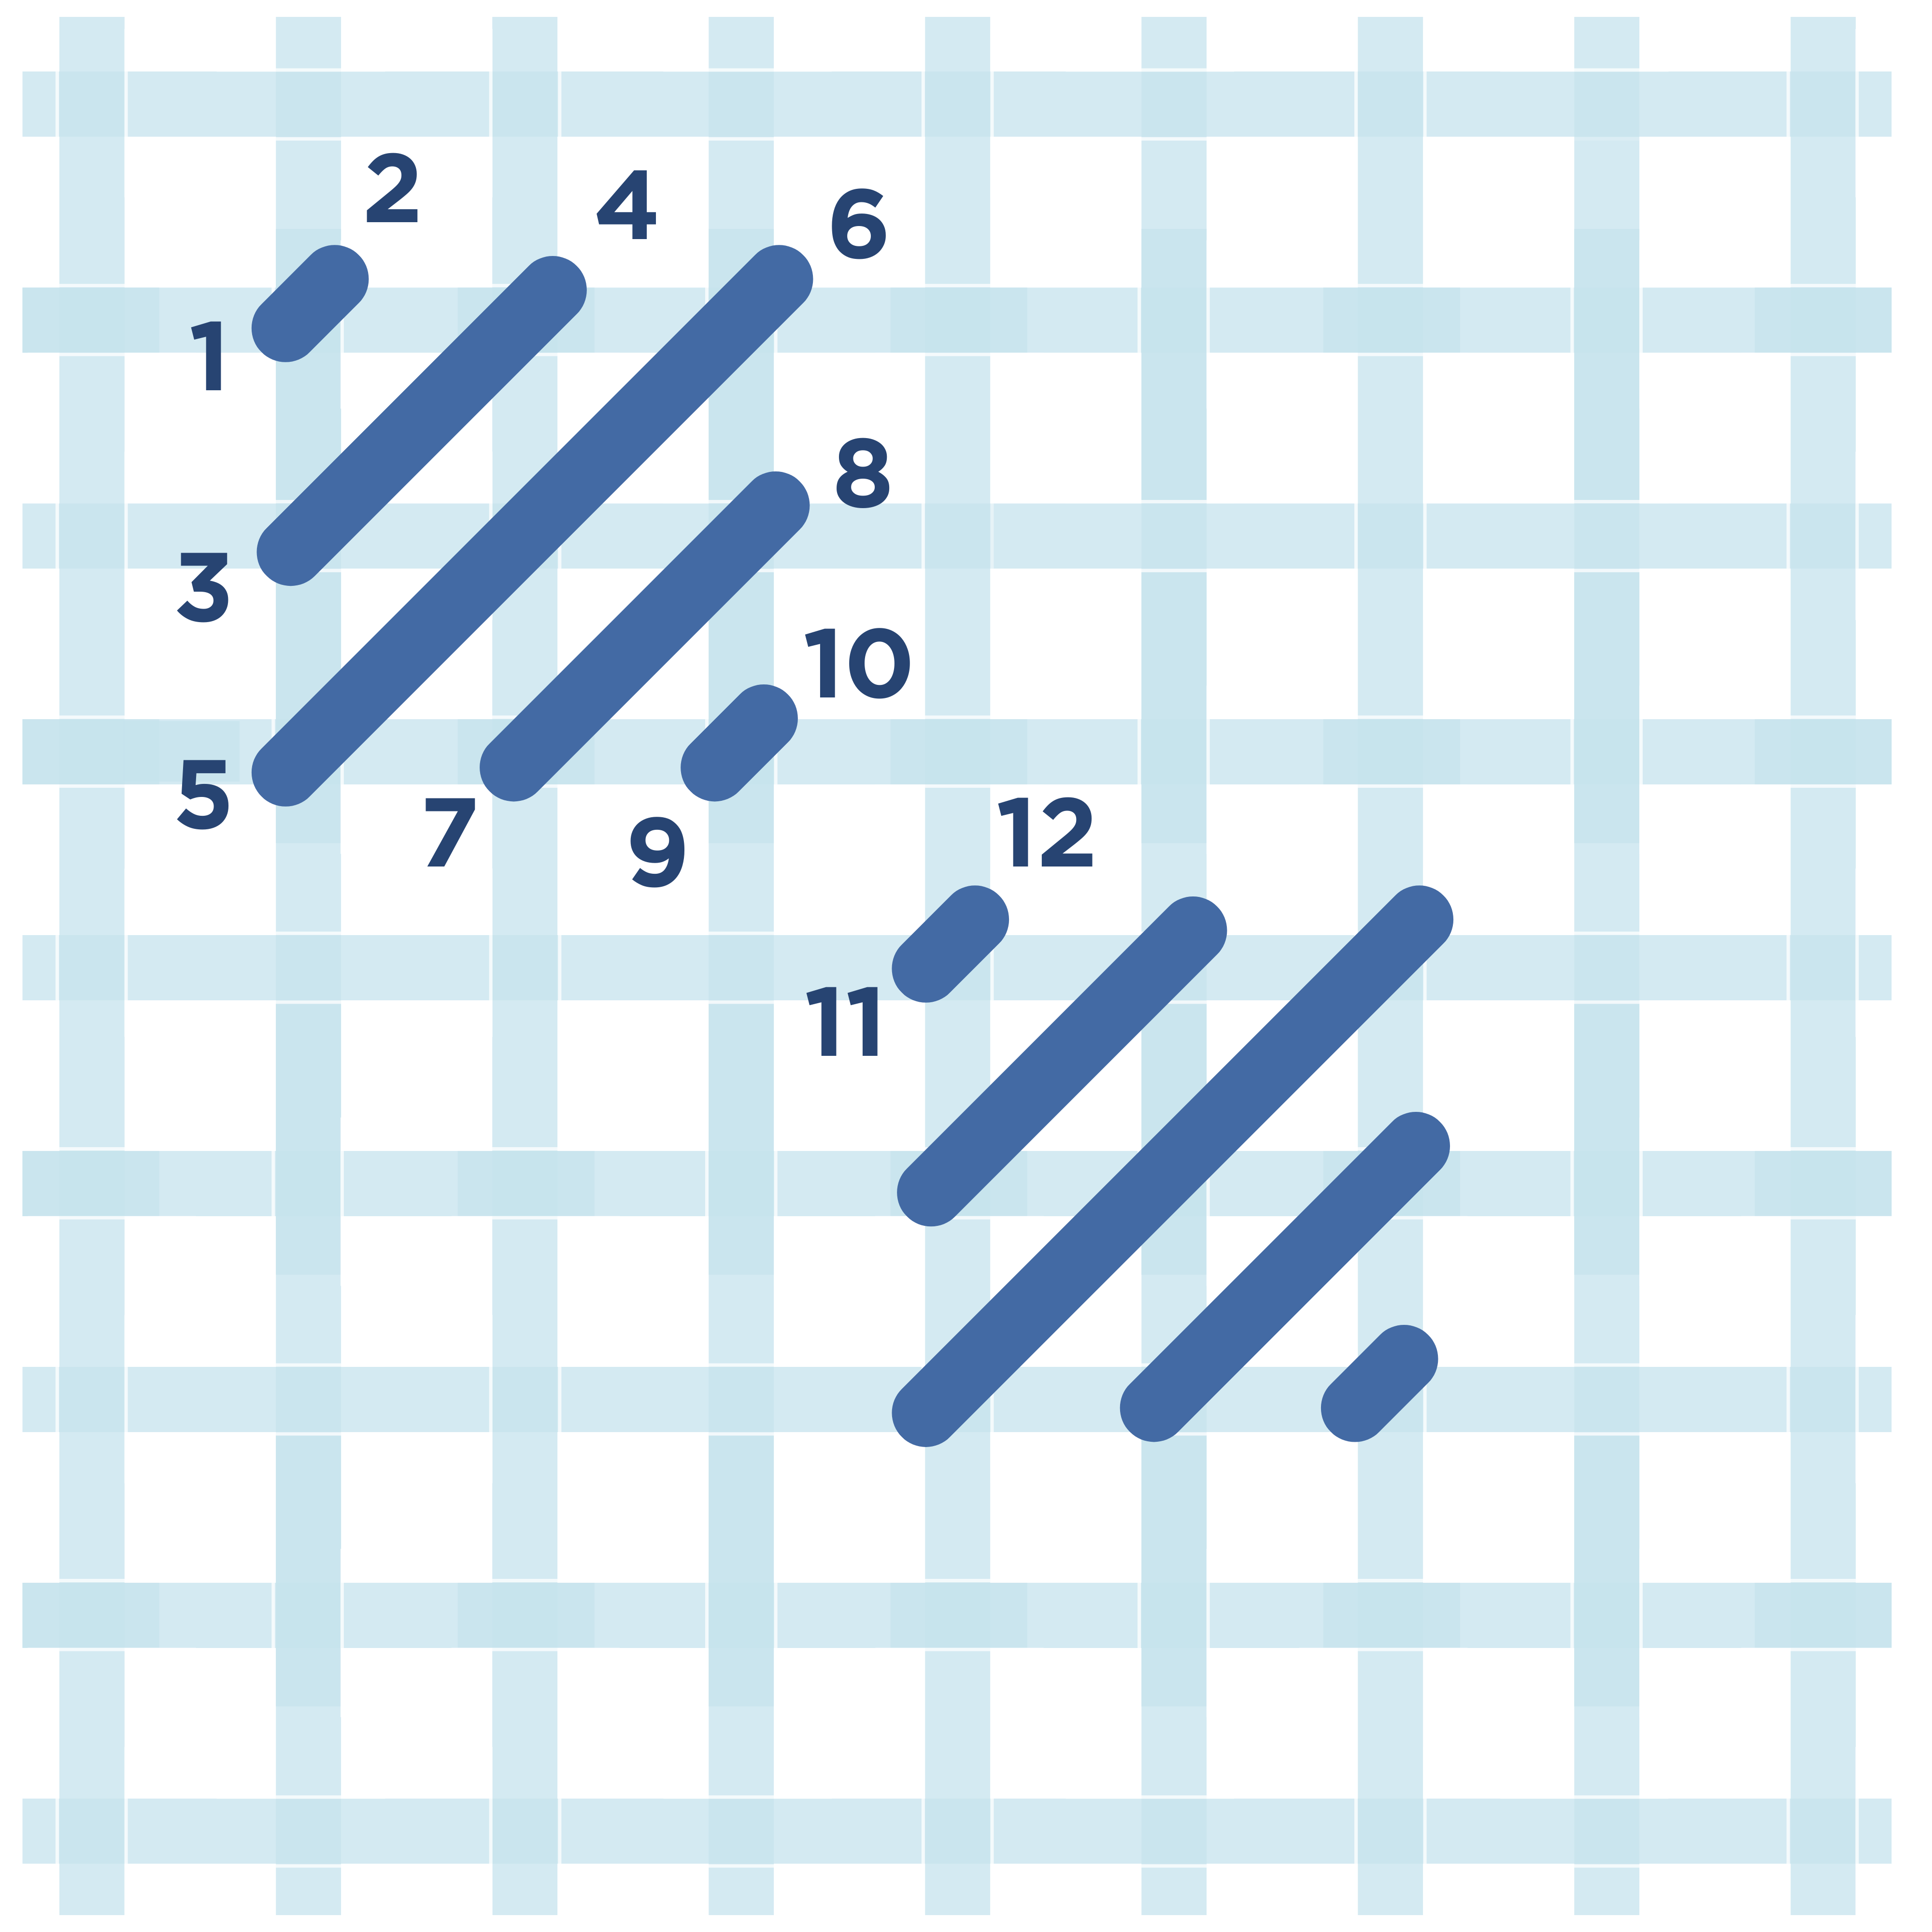
Secure your thread and begin with one diagonal Tent Stitch.
2. Increase Your Stitch Length
Directly beside your first stitch, create another diagonal stitch that spans two canvas intersections. Follow it with a longer diagonal stitch spanning three intersections.
3. Decrease Your Stitches
Work your way back down by creating a stitch over two canvas intersections, followed by another Tent Stitch.
4. Complete the Square
These stitches form one Scotch Stitch unit. Continue repeating the same sequence, keeping each square aligned with the ones around it.
Once you get the rhythm down, Scotch Stitch is incredibly satisfying and gives your canvas a polished, geometric texture.
How to Stitch Skip Tent Stitch
Skip Tent is one of my favorite ways to add a little texture without making an area feel too heavy. If you’re comfortable with Basketweave, this is a great stitch to try next because it follows the same diagonal direction while intentionally leaving some canvas exposed.
I especially love using Skip Tent for backgrounds and larger areas because it adds interest without distracting from the main elements of the canvas.

1. Work on the Diagonal
Just as you would with Basketweave, begin by working Tent Stitches along a diagonal row.
2. Skip a Row
Leave the next diagonal row of canvas intersections open.
3. Stitch the Next Row
Move to the following diagonal and work another row of Tent Stitches.
4. Repeat
Continue alternating stitched and open diagonal rows, making sure your skipped spaces stay aligned throughout the pattern.

The finished effect is light, airy, and textured—perfect when you want a background stitch that lets the rest of your canvas do the talking.
How to Stitch Wicker Stitch
Wicker Stitch mimics the look of woven wicker, creating a basket-like texture that adds so much dimension to a canvas. It’s one of my favorites for anything coastal or preppy—the finished texture instantly reminds me of Nantucket baskets, picnic baskets, and woven summer accessories.

1. Start with Vertical Stitches
Begin by creating a group of vertical stitches. Wicker Stitch can be worked over different stitch lengths depending on the scale you want; here, we’re working over three canvas threads.
2. Switch to Horizontal Stitches
Directly beside your vertical group, create a group of horizontal stitches using the same stitch length.
3. Alternate Your Direction
Continue switching between vertical and horizontal groups as you work across the canvas.
4. Repeat
Carry the pattern across and down your stitching area, keeping each group aligned to create the woven effect.

Wicker Stitch is especially fun anywhere you want to mimic an actual woven texture, but it also makes a beautiful decorative background.
How to Stitch Double Parisian Stitch
Double Parisian Stitch uses repeating groups of long and short vertical stitches to create a clean, woven effect. It adds texture and movement without feeling too busy, making it a great option for backgrounds, larger shapes, sails, and other areas that could use a little dimension.

1. Establish Your Pattern
Begin with two long vertical stitches worked over four canvas threads.
2. Add the Short Stitch
Follow the two long stitches with one shorter vertical stitch worked over two canvas threads.
3. Repeat
Continue the sequence—two long stitches followed by one short stitch—across the area.
4. Keep Your Tension Consistent
Because the longer stitches span several canvas threads, even tension is key to keeping everything looking smooth and polished.
MJD Tip: If you’re working with a thread that likes to twist or separate, try using a laying tool to help your stitches sit flat.
The finished pattern has a subtle striped effect that feels structured while still adding plenty of visual interest.
How to Stitch Diagonal Cashmere Stitch
Diagonal Cashmere is a structured stitch with just enough movement. Its repeating Cashmere units travel across the canvas on a diagonal, creating a tailored texture that feels interesting without becoming too busy.
I especially love this stitch for architectural details, borders, rooftops, brickwork, and other structured elements.

1. Build Your First Cashmere Unit
Begin with one Tent Stitch, followed by two longer diagonal stitches and another Tent Stitch. Keep every stitch slanting in the same direction to create the first block of your pattern.
2. Step It on the Diagonal
Instead of stacking the next unit directly below the first, move it over by one canvas thread. Begin the first of your two longer stitches one canvas thread to the right of the Tent Stitch you just completed.
3. Continue the Pattern
Repeat the Cashmere units, allowing each new section to connect visually with the one before it.
4. Keep Your Columns Consistent
Continue building staggered columns across the area. As the pattern grows, you’ll start to see the diagonal movement take shape.
The result is clean, dimensional, and especially good when you want to give a structured area of your canvas a little more personality.

How to Stitch Woven Trellis Stitch
Woven Trellis is all about texture. Its repeating stitches create an interlaced, lattice-like effect that gives the canvas a dimensional, almost woven appearance. It works beautifully for backgrounds, borders, florals, and geometric areas where you want the stitch itself to become part of the design.

1. Work in Groups of Three
Each section is made up of three stitches: two longer stitches worked over three canvas threads and one shorter stitch worked over two.
2. Establish Your First Group
Begin with a long stitch over three canvas threads, add the shorter stitch over two, and finish with another long stitch over three.
3. Offset Your Next Row
As you begin the next section, offset the stitches so they nest into the previous row. This staggered placement is what creates the woven, trellis-like effect.
4. Keep Your Tension Even
Maintain consistent tension as you work so the pattern stays structured without pulling or distorting the canvas.
5. Have Fun with Color
Use one color for a more subtle, sophisticated texture, or bring in multiple shades to make the woven pattern stand out.
Woven Trellis is such a fun option when you want your stitch choice to add an extra layer of detail to the finished canvas.


